10 Moonlight Selfie Poses for Stunning Night Photos (With Easy Pose Ideas)
Published on August 03, 2026
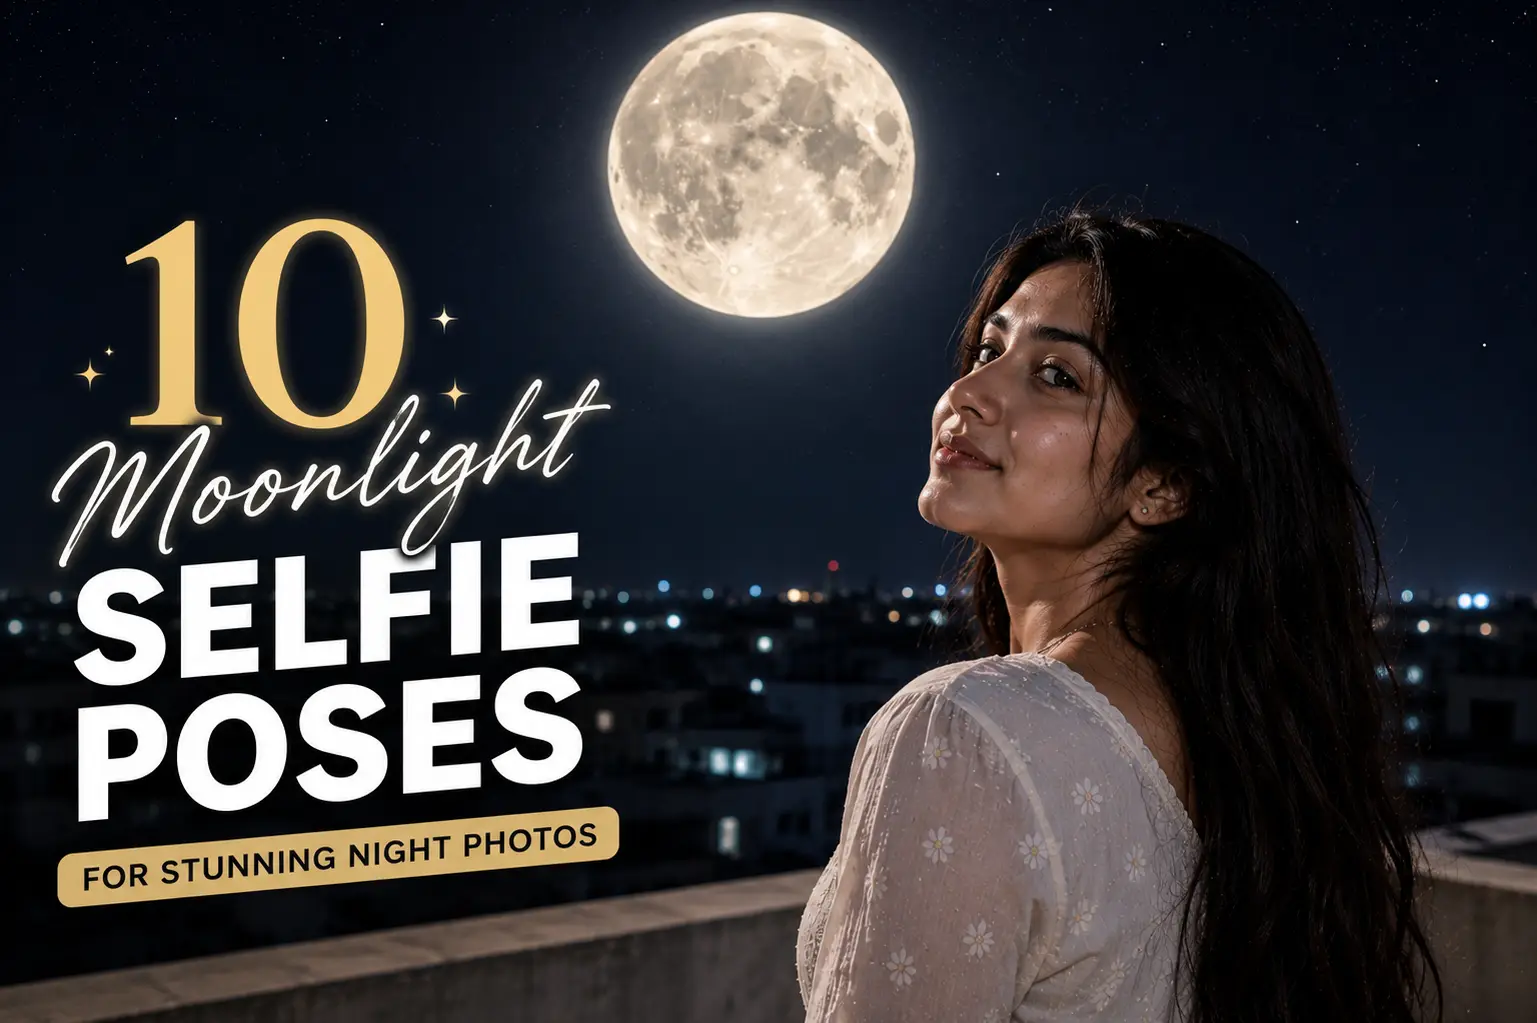
There's something quietly magical about a moonlit sky that daytime photography just can't copy. The world slows down, the light softens into shadow, and a single glowing moon against a dark sky instantly gives a photo a peaceful, almost cinematic feel. Whether it's a full moon lighting up the whole night or a thin crescent hanging low on the horizon, moonlight selfie poses have become one of the most popular ways to capture that calm, dreamy atmosphere.
The best part is you don't need professional gear to pull this off. Most of these poses work perfectly well with a smartphone, as long as you know a few basics about angles, timing, and light. This guide walks you through ten easy moonlight selfie poses, along with the camera angles, lighting notes, and settings that make each one work. Everything here is written for beginners, so even if you've never tried night photography before, you'll be able to recreate these shots on your very next clear night.
🚀 Scale Your Business to New Heights!
Get your own premium website built at the best price. Supercharge your online presence and 10x your growth with our Expert Digital Marketing and AI Website Development services.
Build Your Website - Click Here✉️ info@rankrocketlodi.com | 🌐 RankRocketLodi.com
Quick Checklist
- ✔ Smartphone with Night Mode
- ✔ Clean Camera Lens
- ✔ Tripod or Stable Surface
- ✔ Camera Timer
- ✔ Clear Sky
- ✔ Minimal Ambient Light
Why Moonlight Selfies Look So Beautiful
Moonlight photography has a mood that's hard to recreate any other way, and a few simple things make it work so well.
- Natural Night Atmosphere - the moon and the dark sky automatically create a dramatic setting without you having to add anything extra.
- Contrast - a bright moon set against a deep, dark sky naturally pulls the eye, giving your photo instant visual impact.
- Silhouettes - moon photography is especially effective for silhouette shots, since the moon's glow outlines your shape beautifully against the sky.
- Creative Perspective - by aligning the moon with your fingers, hand, or shoulder, you can create fun forced-perspective shots that look like you're actually touching or holding the moon.
- Calm and Romantic Mood - a night sky creates a completely different emotion compared to daytime photography - quieter, softer, and more reflective.
- Minimal Backgrounds - an open night sky gives you one of the cleanest, least distracting backgrounds you can ask for.
Quick Summary
| Pose | Difficulty | Best Moon Phase | Best For |
|---|---|---|---|
| Reaching for the Moon | Easy | Full / Almost Full | Dreamy, magical shots |
| Moon Between Fingers | Easy | Any Moon Phase | Creative illusion photos |
| Looking at the Moon | Easy | Full Moon | Peaceful, emotional photos |
| Silhouette with Moon | Medium | Full Moon | Artistic, mysterious shots |
| Moon on the Shoulder | Medium | Full / Gibbous | Aesthetic portrait shots |
| Hands Framing the Moon | Easy | Crescent / Full | Creative framing photos |
| Sitting Under Moonlight | Easy | Any Moon Phase | Calm lifestyle photos |
| Side Profile Glow | Medium | Full Moon | Elegant cinematic portraits |
| Moon Kiss | Easy | Crescent / Full | Playful, romantic photos |
| Full Body Moon Backdrop | Medium | Full Moon | Dramatic full-body shots |
Top 10 Moonlight Selfie Poses
1. Reaching for the Moon Pose

This is one of the most recognizable moonlight selfie poses out there, and it's easy to see why. You simply reach one hand up toward the moon, as if you're trying to touch it, creating a dreamy, almost childlike sense of wonder. It works especially well when the moon is fairly high in the sky, giving you enough room to frame both your hand and the moon together.
- How to Capture It: Stand with your arm extended upward toward the moon, fingers slightly open as though reaching for it. Keep your body relaxed and your gaze either on your hand or on the moon itself.
- Best Camera Angle: Slightly below eye level, angled upward so the moon appears just above or beside your reaching hand.
- Best Moon Phase: Full or almost full moon, since it's bright and large enough to line up clearly with your hand.
- Best Lighting: Rely mainly on the moon's natural glow, with minimal ambient light around you to keep the sky looking dark and dramatic.
- Pro Tip: Take a few practice shots first to find the exact spot where your hand and the moon line up - a few inches of movement can make a big difference.
- Common Mistake: Standing too far from the camera, which makes it hard to line up your hand with the moon accurately.
2. Moon Between Fingers Pose

This pose uses a simple trick called forced perspective - where the moon, which is obviously very far away, is positioned so it looks like it's being pinched or held between your fingers. It's a fun, playful pose that works with almost any moon phase.
- How to Capture It: Hold your hand up with your thumb and index finger slightly apart, and adjust your position until the moon appears to sit exactly between them. Since the moon is so far away, even small hand movements will shift its position in the frame.
- Best Camera Angle: Eye level, with the camera positioned so both your hand and the moon are in sharp enough focus to read clearly.
- Best Moon Phase: Any phase works, since the trick relies on positioning rather than moon brightness.
- Best Lighting: Minimal ambient light works best so the moon stands out clearly against the dark sky.
- Pro Tip: Move your hand slowly while your photographer keeps the camera steady - it's much easier to adjust the hand than to keep repositioning the whole shot.
- Common Mistake: Moving the camera instead of your hand, which makes it harder to get the illusion to line up precisely.
3. Looking at the Moon Pose

This pose keeps things simple and quiet. You're captured in profile or a three-quarter angle, gazing up at the moon with a calm, natural expression. It's one of the more peaceful poses on this list, and it doesn't require any tricky alignment. I've found this pose usually looks better when you actually look toward the moon instead of trying to keep one eye on the camera. Letting your attention genuinely rest on the moon gives the photo a much more natural feeling.
- How to Capture It: Stand in profile or turn slightly toward the camera in a three-quarter angle, then look up toward the moon with a relaxed expression.
- Best Camera Angle: Side profile or three-quarter angle, capturing both your face and enough of the sky to show the moon clearly.
- Best Moon Phase: Full moon, since its brightness makes it a clear focal point in the frame.
- Best Lighting: The moon's glow alone is often enough, though a soft light source nearby can help define your features if the moon isn't bright enough on its own.
- Pro Tip: Hold the pose for a few extra seconds after you think the shot is done - some of the most natural expressions happen right after you've "finished" posing.
- Common Mistake: Glancing back and forth between the moon and the camera, which makes the expression look uncertain instead of calm.
4. Silhouette with Moon Pose

Silhouette shots are some of the most striking moonlight selfie poses, since they rely on shape rather than detail. Your outline is captured clearly against the glow of the moon, while your features stay in soft shadow.
- How to Capture It: Position yourself directly between the camera and the moon, so your outline is clearly visible against its light. Keep your pose simple - standing, sitting, or a gentle profile turn all work well.
- Best Camera Angle: Straight-on or slight side angle, with the moon positioned directly behind or beside you for maximum contrast.
- Best Moon Phase: Full moon, since it provides enough brightness to create a clear silhouette effect.
- Best Lighting: Expose for the moon and sky rather than your face - this is what naturally turns your body into a silhouette.
- Pro Tip: Tap on the moon or the sky (not your face) on your phone screen before shooting, so the camera exposes correctly for the bright background.
- Common Mistake: Trying to keep your face visible while also silhouetting your body, which usually just overexposes the moon instead.
5. Moon on the Shoulder Pose

This is another forced-perspective pose, where the moon appears to be resting gently on your shoulder. It takes a bit more trial and error to line up than some of the other poses, but the result feels genuinely creative.
- How to Capture It: Turn your body so your shoulder is angled toward the camera, then adjust your position until the moon appears to sit just above or on your shoulder line.
- Best Camera Angle: Slightly to the side, low enough that the moon lines up naturally with your shoulder rather than floating far above it.
- Best Moon Phase: Full or gibbous moon, since a larger, brighter moon is easier to align clearly with your shoulder.
- Best Lighting: Minimal ambient light keeps the moon as the clear focal point of the composition.
- Pro Tip: Have your photographer move slightly left or right instead of you moving - small camera adjustments make it easier to fine-tune the alignment.
- Common Mistake: Standing too close to the camera, which makes the moon appear too small to convincingly rest on your shoulder.
Common Moonlight Selfie Mistakes to Avoid
A few small mistakes can take away from an otherwise beautiful moonlight photo.
- Overexposing the moon completely - This turns the moon into a flat white blob instead of a detailed glowing sphere.
- Using too much digital zoom - Heavy digital zoom makes the image grainy and blurry rather than genuinely closer.
- Camera shake - Even small movements can blur night shots, since cameras naturally use slower shutter speeds in low light.
- A dirty camera lens - Smudges are far more noticeable at night, often showing up as extra glare or haze around the moon.
- Heavy flash - Flash rarely reaches the moon and usually just washes out your face instead.
- Excessive editing - Overprocessed night photos can start to look artificial fast, especially around the moon itself.
- Expecting both your face and the moon to be perfectly exposed in the same shot - These two subjects have very different brightness levels, so some compromise is usually needed.
- Artificially enlarging the moon in editing - Making the moon look huge and unrealistic can make a photo feel fake rather than impressive.
6. Hands Framing the Moon Pose

This pose uses your hands to frame the moon, either in a heart shape or a simple circle. It's a sweet, versatile pose that works well solo or with a partner.
- How to Capture It: Bring your hands together in front of you, either forming a heart shape or a rough circle with your fingers, and position them so the moon appears centered within the frame you've created.
- Best Camera Angle: Straight-on, close enough to see both your hands clearly and the moon centered between them.
- Best Moon Phase: Crescent or full moon both work well, since the framing itself is the main focus rather than the moon's exact brightness.
- Best Lighting: Soft ambient light on your hands, combined with the moon's natural glow, keeps the framing visible without overpowering the moon.
- Pro Tip: Practice the heart or circle shape in daylight first so it becomes second nature - it's easier to hold a clean shape at night if you're not thinking too hard about it.
- Common Mistake: Making the hand shape too small or too far from the camera, which makes it hard to see the framing clearly in the final photo.
7. Sitting Under Moonlight Pose

This pose brings a relaxed, lifestyle feel to moonlight photography. You're simply seated somewhere comfortable - a rooftop, a balcony, or a set of outdoor stairs - with the moon visible in the background.
- How to Capture It: Sit in a relaxed position with the moon visible somewhere in the frame, either directly behind you or off to one side. Let your posture stay natural rather than stiff.
- Best Camera Angle: Eye level or slightly above, capturing both your seated pose and enough sky to include the moon.
- Best Moon Phase: Any phase works well for this more casual, lifestyle-style shot.
- Best Lighting: A little warm ambient light nearby, like a porch light or string lights, can help balance the darker sky without overpowering the moon.
- Pro Tip: Choose a familiar, well-lit outdoor spot like a rooftop or balcony rather than an unfamiliar dark area, so you can see clearly where you're sitting.
- Common Mistake: Sitting in a spot with too much bright light nearby, which competes with the moon instead of complementing it.
8. Side Profile Glow Pose

This pose captures your side profile with the moon nearby, aiming for a soft, cinematic glow along your face. It's worth being realistic here: moonlight alone often isn't bright enough to clearly illuminate your face, especially on a smaller or more distant moon.
- How to Capture It: Turn to a side profile with the moon positioned near your face in the frame. If the moonlight alone isn't giving enough definition to your features, a soft nearby light source - like a phone screen, string lights, or a streetlamp - can help fill in just enough detail.
- Best Camera Angle: Side profile, close enough to capture the details of your face along with the moon nearby.
- Best Moon Phase: Full moon, since it offers the most natural brightness for this kind of shot.
- Best Lighting: A combination of the moon's glow and a soft, indirect ambient light source usually works better than relying on moonlight alone.
- Pro Tip: Position any additional light source off to the side rather than directly on your face, so it still feels like natural night lighting instead of a studio setup.
- Common Mistake: Assuming moonlight alone will clearly light up your face - in most real conditions, it simply isn't bright enough without some extra help.
Moonlight Photography Safety Tips
Night photography often means shooting in low light and unfamiliar surroundings, so a few safety basics are worth keeping in mind.
- Keep distance from rooftop edges - Rooftop shots look great, but always stay well back from any ledges or edges.
- Check your surroundings in dark locations - Take a moment to look around before settling into a pose, especially somewhere unfamiliar.
- Avoid unsafe, isolated locations - Choose spots where you feel comfortable and, ideally, aren't completely alone after dark.
- Don't place a tripod in a walkway - Keep your setup out of paths where people or vehicles might pass.
- Respect private property - Always get permission before shooting on rooftops, balconies, or land that isn't yours.
- Don't take risks near water, cliffs, or roads - No photo is worth stepping too close to a dangerous edge or into traffic for the perfect angle.
9. Moon Kiss Pose

This is a playful pose where you appear to place a small kiss toward the moon, or blow one in its direction. It works especially well for couples or as a lighthearted solo shot.
- How to Capture It: Purse your lips slightly toward the moon, as though blowing a kiss, or hold your hand near your mouth and gesture toward the sky. Keep the expression light and playful rather than overly posed.
- Best Camera Angle: Slightly angled, capturing both your expression and the moon in the same general direction.
- Best Moon Phase: Crescent or full moon both work nicely for this playful, lighthearted pose.
- Best Lighting: Minimal ambient light keeps the focus on your expression and the moon together.
- Pro Tip: Take several shots in a row - playful poses like this often look more natural a second or third try in, once you've relaxed into it.
- Common Mistake: Overacting the expression, which can make the pose look exaggerated instead of genuinely playful.
10. Full Body Moon Backdrop Pose

This is the most dramatic of all the moonlight selfie poses, showing your full body with a large, glowing moon behind you. It's worth knowing upfront that a wide-angle lens - the default on most phone cameras - won't make the moon look big in your photo, no matter how impressive the moon looks to your eyes.
- How to Capture It: Stand with the moon positioned behind or beside you, keeping your full body in frame. For the most dramatic backdrop effect, this pose relies more on lens choice and distance than on your actual pose.
- Best Camera Angle: Straight-on or slightly angled, with enough distance between you and the camera to fit your full body along with the moon.
- Best Moon Phase: Full moon, since it's the brightest and most visually striking option for a dramatic backdrop.
- Best Lighting: Rely mainly on the moon's glow, keeping other light sources minimal so the moon remains the clear focal point.
- Pro Tip: If you want the moon to look larger relative to your body, use a telephoto or zoom lens and have your photographer stand farther away from you - this compresses the distance between you and the moon visually.
- Common Mistake: Using a wide-angle lens and standing close to the camera, which almost always makes the moon appear as a small, distant dot rather than a dramatic backdrop.
Best Moon Phases for Selfies
- Full Moon: The brightest and most dramatic option, ideal for silhouettes, moon-backdrop shots, and any pose where you want the moon to be a strong, clear focal point.
- Waxing or Waning Gibbous: Still quite bright, with slightly more visible shape and detail than a full moon, making it a solid choice for most poses on this list.
- Crescent Moon: Best suited for minimal, artistic photos and hand-framing poses, where the moon's shape adds character rather than sheer brightness.
- Near New Moon: Generally not suitable for moon-centric poses, since there's very little visible moon to work with in the frame.
Best Camera Settings for Moonlight Selfies
- Night Mode: Particularly useful for static poses where you can hold still for a second or two while the camera gathers more light.
- Exposure: Tapping on the moon itself on your screen can help control the highlights so it doesn't turn into a blown-out white circle.
- Focus: Decide whether your subject or the moon needs to be sharper, and tap to focus accordingly - trying to keep both perfectly sharp isn't always realistic.
- Timer: A 3–10 second timer gives you enough time to get into position after tapping the shutter.
- Telephoto Lens: If your phone has one, a telephoto lens is genuinely useful for making the moon appear relatively larger in the frame.
- Digital Zoom: Try to avoid pushing digital zoom too far, since it tends to make the image grainy rather than genuinely detailed.
- HDR: Worth testing depending on the scene, but it isn't automatically the best choice for every night shot - sometimes it can make the moon look flatter than expected.
How to Make the Moon Look Bigger in Photos
This is one of the most common questions in moon photography, and there are a few genuinely useful ways to approach it. Using 2x, 3x, or 5x optical telephoto zoom, where your phone has it, is one of the most effective options, since optical zoom doesn't lose detail the way digital zoom does. Having your photographer move farther away from you while keeping the same framing also helps, since greater distance combined with zoom compresses the scene and makes the moon appear larger relative to your body. Composing your shot when the moon is near the horizon can also help visually, since it's often positioned closer to buildings, trees, or hills that give it a sense of scale. It's worth limiting digital zoom, since pushing it too far introduces grain and blur rather than a genuinely bigger-looking moon. Finally, some photographers use forced perspective - positioning the moon carefully within the frame relative to a foreground subject - to create the illusion of a larger moon without any zoom at all.
What to Wear for Moonlight Photos
For Girls
A white dress stands out beautifully against a dark night sky. A black outfit works well for silhouette-style shots, while a red dress adds a striking pop of color under moonlight. A traditional suit brings a cultural touch to night portraits, and any light-colored, flowing outfit adds movement if there's a breeze.
For Boys
A white shirt photographs cleanly against the dark background, while a black shirt works particularly well for silhouette poses. A denim jacket adds a casual, everyday feel, and a kurta brings a more traditional look to night photography. Neutral tones in general tend to photograph the most naturally under moonlight.
Couple Photos
Complementary colors generally work better than identical matching outfits, since they photograph as a cohesive pair without looking overly coordinated.
Editing Tips for Moonlight Photos
Lightroom Mobile gives you solid control over exposure, highlights, shadows, and noise reduction, all of which are especially useful for night photos. Snapseed is great for selective adjustments, like brightening just your face without affecting the sky. Your phone's built-in editor can handle basic exposure, contrast, and cropping if you want to keep things simple.
One important note: don't replace or dramatically enlarge the real moon just to make the photograph look more impressive, unless you're intentionally creating a composite image and openly say so. Keeping your edits honest is part of what makes moonlight photography feel genuine rather than staged.
Frequently Asked Questions
-
Can I take good moonlight selfies with a normal phone?
Yes, most modern smartphones with Night Mode can capture solid moonlight selfies, especially with a stable surface and a few basic settings adjusted. -
What is the best moon phase for selfies?
A full moon is generally the easiest to work with, since it's the brightest and creates the clearest silhouettes and backdrops. -
Should I use flash for moonlight selfies?
No, flash rarely helps at night and usually just overexposes your face while doing nothing for the moon itself. -
How do I make the moon look bigger?
Optical zoom, greater shooting distance combined with a telephoto lens, and careful composition near the horizon all help make the moon appear larger. -
Why does the moon look like a white dot in my photos?
This usually happens with wide-angle lenses and overexposed settings, both of which shrink and flatten the moon's appearance. -
Is Night Mode good for moon photography?
Yes, especially for static poses, though it's less effective for movement-based shots since it typically needs a longer exposure time. -
How can I take a moon selfie alone?
A tripod or stable surface combined with a camera timer makes solo moonlight selfies much easier to set up and adjust. -
Which pose is easiest for beginners?
The looking at the moon pose and the reaching for the moon pose are both simple, forgiving options for beginners. -
Can I photograph both my face and the moon clearly?
It's difficult, since the moon and your face usually need very different exposure levels - some compromise between the two is often necessary. -
What is the best time to photograph a full moon?
Shortly after moonrise, when the moon is lower in the sky, often gives the most dramatic and interesting compositions.
Final Thoughts
You don't need every shot to be technically perfect to get a beautiful moonlight selfie. Sometimes a small crescent moon, a slightly dark silhouette, and a natural, relaxed expression create a much more memorable photo than an aggressively edited full moon ever could. Start simple - try the reaching for the moon pose or the looking at the moon pose first - and build up to trickier ones like the full body moon backdrop once you're comfortable with your camera's night settings.
Which moonlight selfie pose would you try first?
Written by Sandeep
Passionate digital content creator and photography enthusiast. Discover more guides on framing, lighting, and perfect poses on our blog.
Read my full story →